
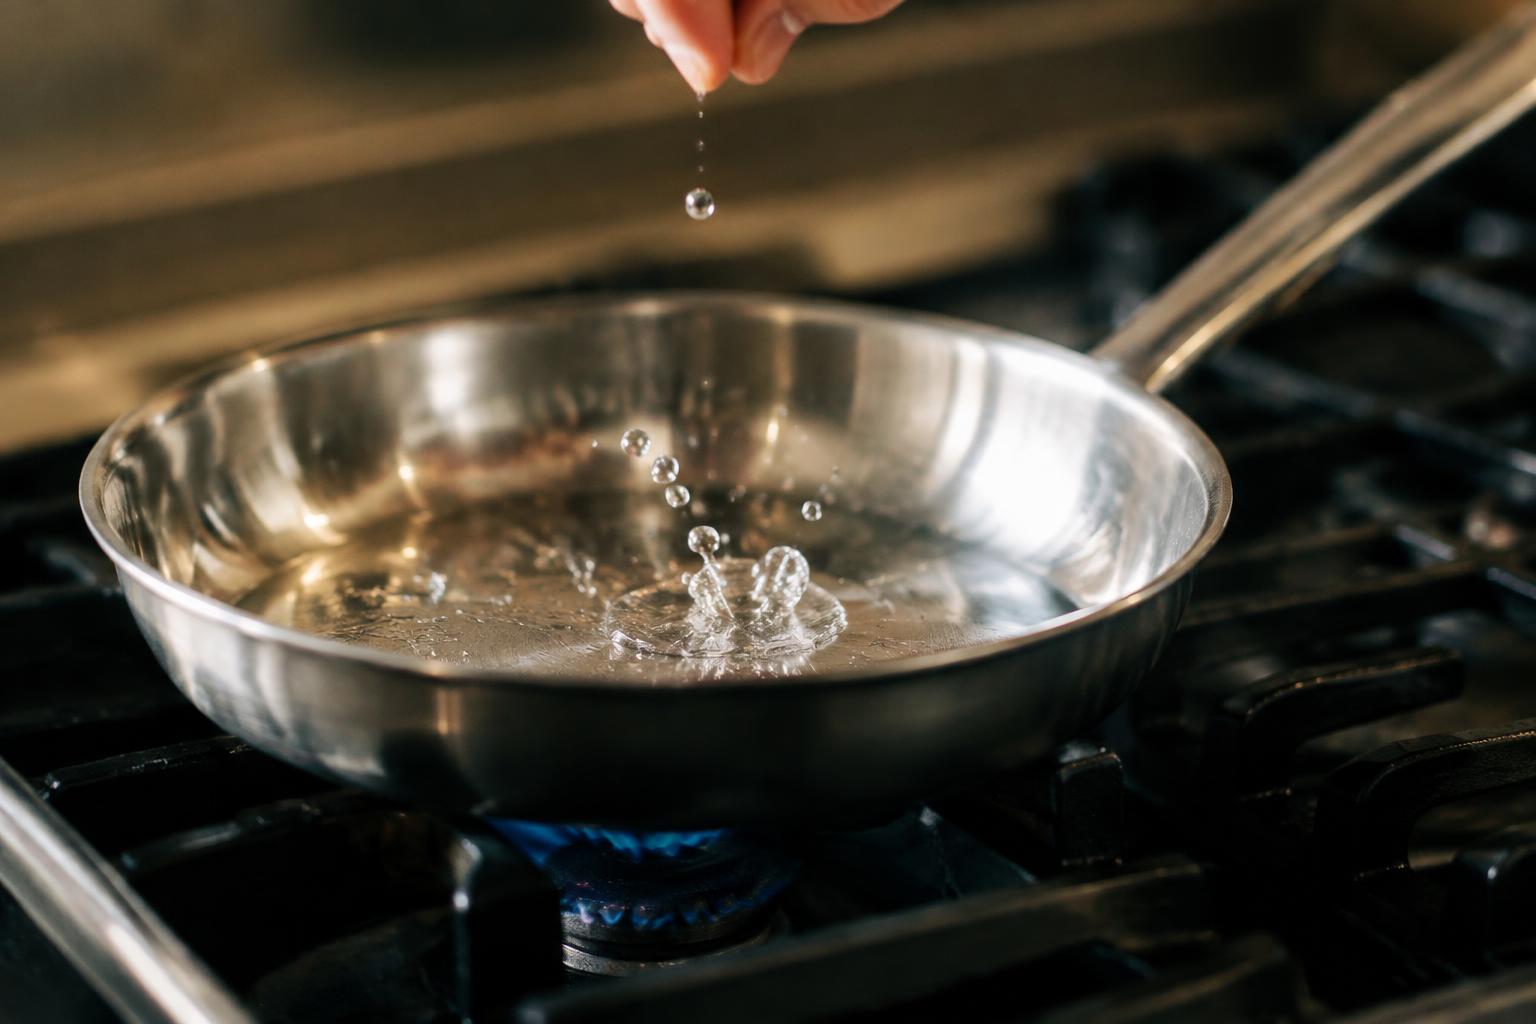
A pan that is too cool can leave food pale and sticking, while an overheated one can scorch oil before dinner hits the surface. Instead of counting minutes, you can read the pan’s visual and tactile cues and judge its heat in context. A stainless-steel skillet, for instance, often shows readiness when a drop of water beads and glides across its surface.
Key Takeaways:
- Look for physical cues rather than following a fixed wait: a dry skillet begins to show faint heat ripples, while a drop of water beads and skitters across stainless steel.
- Match the readiness test to the cookware. The water-drop test suits bare stainless steel, while a small piece of food provides a practical cue for seasoned cast iron or nonstick pans.
- Pan material, thickness, burner size, and heat setting all affect warm-up time. Add oil once the pan is hot, then add food when the oil shimmers but does not smoke.
Recognizing Visual Signs of Readiness
Color and reflected light offer useful clues as cookware warms, but their meaning depends on the pan’s material and finish. Look across the cooking surface rather than judging one bright spot, since an overhead lamp can create glare that resembles a temperature change. A stainless-steel skillet, a dark nonstick pan, and seasoned cast iron each show heat differently, so focus on changes in the surface and in any cooking oil already present.
Look for a consistent surface sheen
Across stainless steel, a faint, even sheen can emerge as the metal warms, replacing a dull, patchy appearance. Move your viewpoint slightly to distinguish a true change across the base from a reflection caused by a burner or ceiling light. A dry pan will not always show a clear sheen, and dark coatings may reveal little visual change. On stainless steel, watch for uniform reflected light, not a single glossy patch.
Notice the change in oil’s movement
Once oil is in the pan, its movement provides a clear visual cue: cool oil sits thickly, while warmed oil spreads into a thinner, more fluid film. Gently tilt the pan and watch how quickly the oil travels across the base; it should flow smoothly without smoking. Smoke signals excessive heat, not readiness, and oil that shimmers evenly is generally ready for cooking. Refined oils and extra-virgin olive oil can begin smoking at different temperatures.
- Use overhead lighting consistently while observing the surface.
- Keep the pan base dry before adding cooking oil.
- Watch for smoke rising from the oil.
Testing Pan Readiness Without a Timer
Simple kitchen cues give you a practical read on heat without relying on elapsed minutes. Water reveals how energy is reaching the cooking surface, while a small piece of food shows how ingredients will respond. Use these tests with care: water can spit or scatter, and food left too long in a hot pan can burn. Read the result promptly, then adjust the burner if the pan is not ready.
Use the water-drop test safely
Dip your fingers in water, then flick just a few drops onto the dry pan from a safe distance; never pour water from a glass or cup. On a cooler surface, droplets sit and evaporate slowly. At cooking heat, they sizzle and disappear quickly; on a very hot pan, drops may bead and skate. Keep your face and hands back, and wipe away moisture before adding oil to prevent splattering.
Check with a small piece of food
A small piece of food offers a direct test of how the pan cooks. Add a piece of bread, onion, or the ingredient you plan to cook, and listen for a steady sizzle. Little sound and pale contact suggest the pan needs more heat; rapid browning or smoke signals excessive heat. Use a small sample, watch its underside closely, and remove it as soon as its color shows the pan is ready.
| Test | Readiness cue | What to do |
|---|---|---|
| Water drops | Slow evaporation | Give the pan more heat |
| Water drops | Quick sizzle and evaporation | Dry the pan before adding oil |
| Water drops | Beading and skating | Reduce heat if the pan is too hot |
| Small food sample | Steady sizzle and gradual browning | Begin cooking |
| Small food sample | Rapid browning or smoke | Lower the heat |
Factors That Affect Heating Time
Pan readiness depends on how quickly heat moves from your stove into the cooking surface and spreads across it. A flame, electric coil, glass-ceramic element, and induction zone transfer energy differently, while the pan’s construction and footprint change how much metal must warm. These differences explain why the same visual cue can appear sooner on one setup than another. Watch for uneven hot spots on a pan that extends well beyond its heat source.
Compare common pan materials
Stainless steel heats less evenly than thick aluminum or copper unless its base includes a conductive core, so the center can become ready before the edges. Cast iron takes longer to warm because of its mass, then holds heat well after you lift it from the burner. Thin aluminum responds quickly but also changes temperature quickly. A heavy clad pan spreads heat across its base, while a lightweight skillet often develops a hotter center.
Account for pan size and burner type
A wide skillet needs a burner or element that reaches close to its base diameter; otherwise, the center warms first while the outer cooking area stays cooler. On gas, flames that climb the pan’s sides waste heat and can overheat the handle. Electric coils and glass-ceramic elements transfer heat through contact, while induction requires compatible magnetic cookware and a properly sized zone. A well-matched burner warms the flat base more consistently than a small element beneath an oversized pan.
- Keep the pan base flat against an electric coil or glass-ceramic surface.
- Center the pan over the burner before heating.
- Use a magnet to confirm whether a pan is induction-compatible.
How to Adjust Heat for Even Cooking
Even browning depends on how steadily heat reaches the pan and food, not simply on the burner setting. Match the flame or element to the pan’s size, then adjust in small increments as cooking progresses. A burner that extends beyond the pan’s base creates hot spots, while a heavy pan responds more slowly to setting changes than a thin one. Watch for color developing evenly across the cooking surface.
| Pan or burner condition | Heat adjustment | What to watch |
|---|---|---|
| Burner larger than pan base | Lower the setting | Darkening at the edges |
| Thin pan heating quickly | Reduce heat in small steps | Rapid color changes |
| Heavy pan responding slowly | Allow time before another change | Color across the base |
Preheat gradually
Start with a moderate burner setting so heat spreads through the pan rather than concentrating at its center. A gradual preheat is especially useful with cast iron and other thick pans, which retain heat after the burner changes. Move the pan to center it over the flame or element, and avoid turning a cold pan straight to high heat. Even warming reduces the chance of a dark center before the rest of the cooking surface is ready.
Lower or raise heat as needed
Watch the food’s color and sound as it cooks, then make small burner adjustments instead of reacting with a sharp change. If one area browns much faster, lower the heat and reposition the pan over the burner; if browning stalls across the surface, raise the setting slightly. Heavy pans continue releasing stored heat after you turn the burner down, so allow that response before adjusting again. Small corrections limit scorching at the pan’s center.
Tips for Adding Oil and Food
Once the pan is ready, the order and amount of what you add shape how evenly ingredients cook. Keep your oil and food close at hand so you can move from heating to cooking without delay. For delicate items such as fish, a thin coating of oil across the cooking surface limits sticking; heartier vegetables need enough space to make direct contact with the pan. Prepare ingredients first, then add them in a controlled sequence.
Add oil at the right moment
Pour oil into the heated pan just before adding food, then tilt the pan to spread it into a thin, even film. For stainless steel, this sequence coats the surface after it warms; with a well-seasoned cast-iron skillet, use only enough oil to lightly gloss the cooking area. Add food promptly once the oil is distributed, rather than leaving it to sit while you prepare ingredients.
Avoid crowding the pan
Arrange ingredients in a single layer with small gaps between pieces so steam can escape and surfaces can brown. If chicken thighs or sliced vegetables cover the entire pan, cook them in batches instead of stacking them. A wide skillet gives you more room, but keep each piece in contact with the cooking surface. Leave open space around items such as mushrooms, which release moisture as they cook.
- Pat wet vegetables dry before placing them in the pan.
- Use tongs for turning long strips of meat.
- Choose an oil suited to the dish’s flavor.
Spotting and Correcting Overheating
Excessive heat can damage a pan’s finish, scorch oil, and cause food to burn before its center cooks. Stainless steel, cast iron, and nonstick surfaces show different warning signs, so respond to what you see rather than waiting for a fixed interval. Act promptly when heat gets away from you, and keep water away from hot oil; adding water can cause dangerous splattering. A burner setting and a stable surface are your first tools for bringing the temperature under control.
Watch for smoke and shimmering oil
Oil that spreads into a smooth, mobile sheen is generally ready for cooking, but smoke signals excessive heat, not a cue to add food. Thin wisps rising from oil mean you should stop and lower the burner; a sharp, acrid smell or darkening oil indicates it is already breaking down. On an empty pan, smoke or a strong hot-metal odor also warns that the surface is too hot, especially with nonstick cookware.
Reduce heat before continuing
Turn the burner to low or off as soon as you spot overheating, then move the pan to a cool, heat-safe burner if the handle is clear and you can lift it securely. Never pour water into hot oil, and do not carry a pan that is smoking heavily across the kitchen. Let the pan cool naturally until the smoke stops; discard scorched oil safely, then resume with fresh oil over lower heat.
| Sign | What it indicates | Safe response |
|---|---|---|
| Oil forms a smooth sheen | Heating oil, not necessarily overheating | Watch closely for smoke |
| Thin wisps of smoke | Oil or pan is too hot | Lower the burner or turn it off |
| Acrid smell or dark oil | Oil is breaking down | Let the pan cool and discard the oil |
| Smoke from an empty pan | Surface is excessively hot | Remove it from the heat safely |
Conclusion
Judge pan readiness by its surface and the food you plan to cook, not by elapsed minutes. A drop of water that beads and skitters signals a hot stainless-steel pan, while a faint shimmer in added oil indicates readiness for sautéing. For eggs or other delicate foods, use moderate heat and wait for butter to foam without browning. Adjust the burner if oil smokes or water evaporates instantly, then add ingredients once the pan suits the cooking task.
FAQ
How can I tell whether a pan is ready for cooking without a timer?
A pan is ready when its surface looks evenly heated and a small amount of oil spreads smoothly or a test piece of food sizzles on contact. The best cue depends on the pan and the food, so use moderate heat and check before adding a full batch.
How long should I preheat a pan before cooking?
Preheat a pan over moderate heat for a few minutes, then check its surface or test with a small piece of food. The time varies with the pan’s material and thickness, its size, and the burner, so use those cues rather than a fixed duration.
Is it safe to use the water-drop test on a hot pan?
A small water drop can indicate that a pan is hot, but it may spit or scatter, so keep your face and hands back. Avoid this test on a pan coated with oil, and do not use it as a substitute for checking whether the pan is overheating.
Why does food stick even when the pan feels hot?
Food can stick if the pan is not evenly heated, the surface is unsuitable, or the food is moved before it releases naturally. Preheat gradually, add oil when the pan is ready, and avoid crowding, which can lower the pan’s temperature.
Should I turn up the heat if my pan is taking too long to warm up?
Not necessarily; raising the heat too quickly can create hot spots and overheat the pan before the surface warms evenly. Use moderate heat and allow extra time for a large or thick pan, especially on a weaker burner.